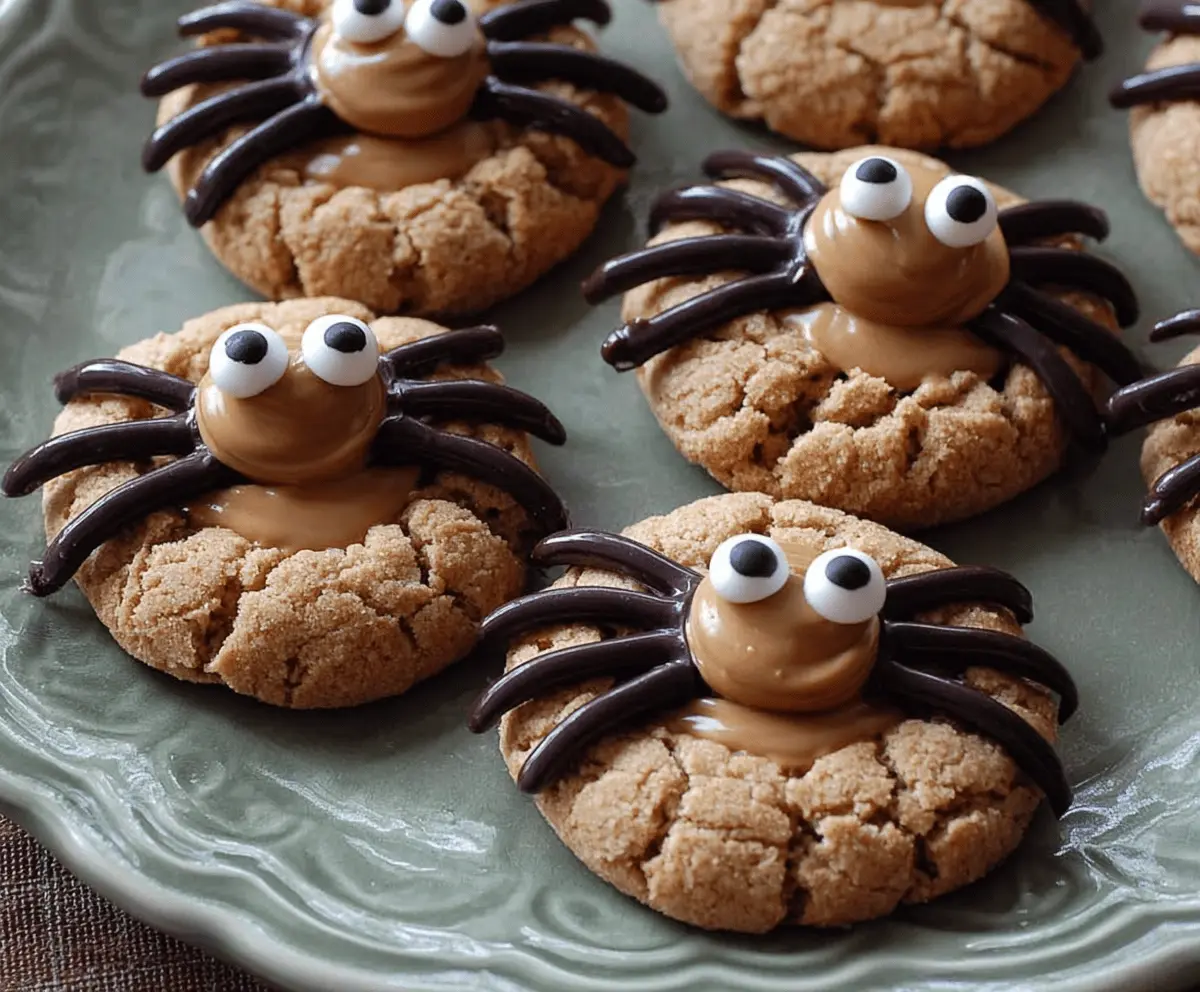
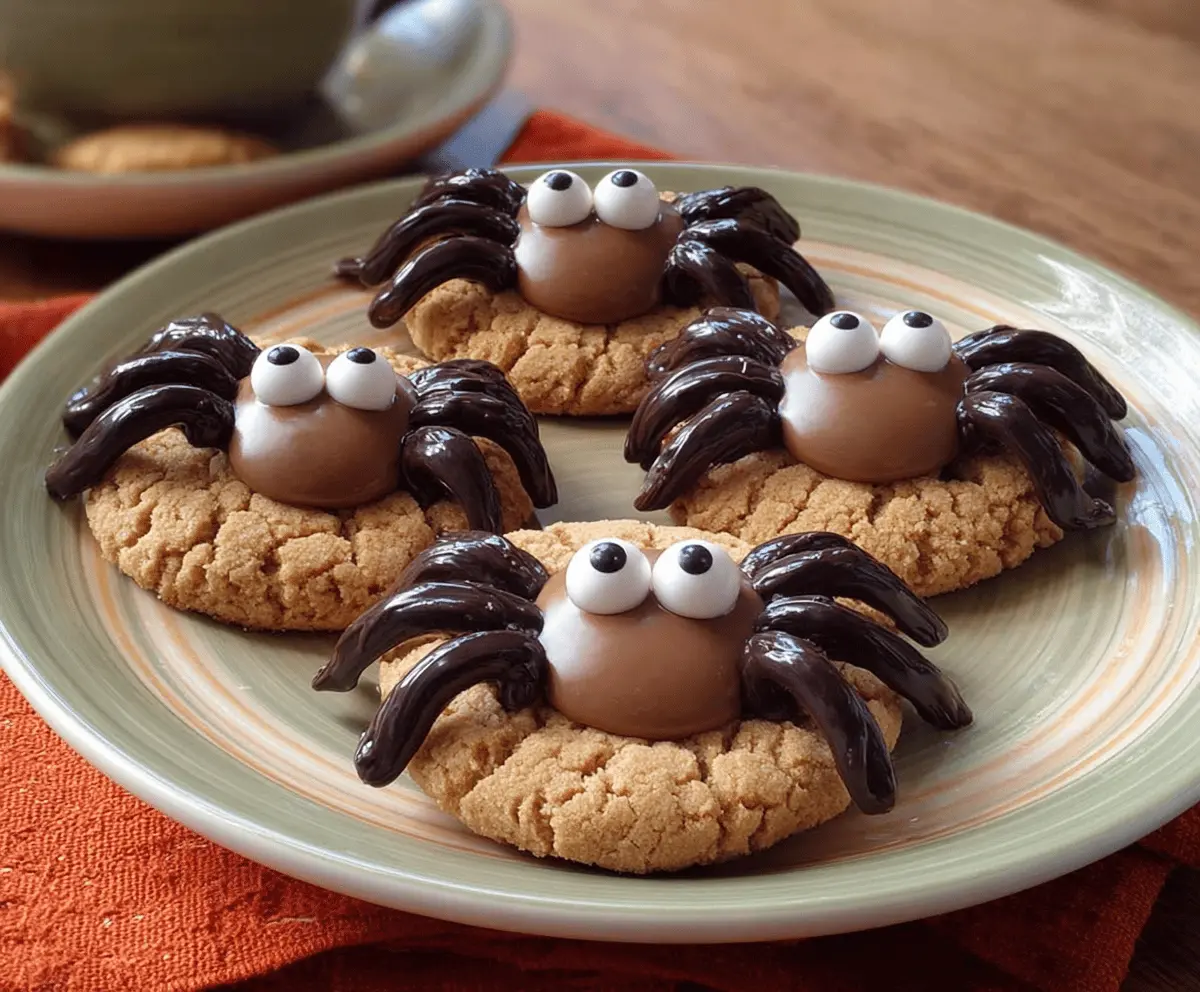
These Peanut Butter Spider Cookies are a fun twist on a classic treat! They’re soft, chewy, and filled with delicious peanut butter flavor. Plus, they have cute chocolate spider legs!
Baking these cookies is a blast! I love getting creative with candy for the spiders. It feels like Halloween every time I make them, even if it’s July! 🕷️🍪
Key Ingredients & Substitutions
Pecan Butter: Creamy peanut butter works best for a smooth texture. If you have nut allergies, almond butter or sunbutter can be great alternatives. They have different flavors but will still make tasty cookies!
Sugar: Granulated sugar gives sweetness and crispness. For a healthier twist, you could use coconut sugar or a sugar substitute, but be mindful they might affect the texture.
Milk Chocolate Kisses: These candies add a delightful touch. If you don’t have them, try using Hershey’s Milk Chocolate Bars or any similar chocolate candy. Dark chocolate also works for a richer flavor!
Candy Eyes: These are fun and make the cookies look like little spiders! If you can’t find these, you can use small chocolate chips or even mini marshmallows to create the eyes.
How Do I Get the Right Texture for My Cookies?
Getting your cookies to be soft and chewy is key. Here’s how to ensure they turn out just right:
- Mix the ingredients until just combined. Over-mixing can lead to tough cookies.
- Watch the baking time; take them out when they are just golden around the edges. They’ll continue to cook a bit while cooling.
For the best results, let the cookies cool on the sheet for a few minutes before transferring them. This helps keep their shape! Enjoy making these fun treats!
Peanut Butter Spider Cookies
Ingredients You’ll Need:
- For the Cookie Base:
- 1 cup creamy peanut butter
- 1 cup granulated sugar
- 1 large egg
- 1 teaspoon baking soda
- 1/2 teaspoon vanilla extract
- For the Spider Decoration:
- 24 Milk chocolate Kisses (or similar milk chocolate drop candies)
- Candy eyes (about 48 small candy eyes, 2 per cookie)
- Black decorating gel or melted chocolate (for spider legs)
How Much Time Will You Need?
You’ll need about 15 minutes to prepare these cookies and around 8-10 minutes to bake them. Plus, it’s a good idea to let them cool for about 5-10 minutes before decorating. Overall, you’re looking at about 30 minutes from start to finish!
Step-by-Step Instructions:
1. Preheat the Oven:
Start by preheating your oven to 350°F (175°C). This way, it’s nice and hot when your cookies are ready to bake! Line cookie sheets with parchment paper or silicone baking mats to prevent sticking.
2. Mix the Dough:
In a medium bowl, combine the creamy peanut butter, granulated sugar, large egg, baking soda, and vanilla extract. Mix everything together until it’s nice and smooth. You can use a spatula or a whisk to make it easier!
3. Shape the Cookies:
Roll the dough into 24 equal-sized balls, about 1 inch in diameter. Place them on the prepared cookie sheets, leaving about 2 inches of space between each ball. This allows room for the cookies to spread as they bake.
4. Flatten the Cookies:
Take a fork and gently flatten each cookie ball. Then, create a crisscross pattern on the top by pressing with the fork in one direction and then the other. This is what gives them that classic cookie look!
5. Bake the Cookies:
Place the cookie sheets in the oven and bake for 8-10 minutes, or until the edges look golden brown. Keep an eye on them, as baking times can vary a bit based on your oven!
6. Add the Chocolate Kisses:
Once the cookies are done, take them out of the oven (be careful—hot!) and immediately press one chocolate Kiss into the center of each cookie. The heat will make them melt slightly, securing them in place.
7. Cool and Decorate:
Let the cookies cool on the baking sheet for about 5 minutes so the chocolate sets a little. Then, while the chocolate is still soft, carefully press 2 candy eyes onto each Kiss, making your spiders come to life!
8. Create Spider Legs:
Now for some fun! Use black decorating gel or melted chocolate to draw 4 spider legs on each side of the chocolate Kiss. Get creative—these legs can be as wild or as simple as you like!
9. Final Cool Down:
Allow the cookies to cool completely before serving or munching on them. This ensures that the legs set firmly, keeping your spooky spiders intact!
Now you have a delightful batch of Peanut Butter Spider Cookies to share (or keep all to yourself)! Enjoy your fun and spooky treat!
Can I Use Natural Peanut Butter Instead of Creamy Peanut Butter?
Yes, you can! Just keep in mind that natural peanut butter may have a different consistency and can make the cookies slightly more crumbly. Stir it well before measuring to ensure the oil is properly mixed in.
How Should I Store Leftover Cookies?
Store leftover cookies in an airtight container at room temperature for up to 5 days. If they last longer than that, consider refrigerating them for freshness. Just allow them to come to room temperature before enjoying again!
Can I Freeze These Cookies?
Absolutely! To freeze, place the cooled cookies in a single layer on a baking sheet and freeze until solid. Then transfer them to an airtight container or freezer bag, separating layers with parchment paper. They’ll last in the freezer for up to 3 months. Thaw at room temperature when you’re ready to eat!
What Chocolate Can I Use Instead of Kisses?
If you don’t have Milk Chocolate Kisses, you can use any chocolate candy, such as chocolate-covered almonds or mini chocolate bars. For a fun twist, try using white chocolate for a different look!