I know you love cool, creamy treats, and nothing beats homemade ice cream on a warm day. I’ve gathered my absolute favorite easy ice cream recipes here, perfect for making in your kitchen. Get ready to create some delicious frozen desserts that everyone will enjoy.
This collection has simple steps and helpful tricks for making the best ice cream, whether you have an ice cream maker or prefer a no-churn method. You’ll find everything from classic flavors to exciting new ideas, all designed to be super easy to follow. Let’s make some amazing ice cream!
Jump to Recipe:
- 1. Easy Brown Sugar Cinnamon Ice Cream
- 2. Easy Cottage Cheese Peanut Butter Ice Cream
- 3. Easy Creamy Almond Milk Ice Cream
- 4. Easy Creamy Lemon Ice Cream
- 5. Easy Homemade Biscoff Ice Cream
- 6. Easy Homemade Blueberry Ice Cream
- 7. Easy Homemade Custard Ice Cream
- 8. Easy Homemade Honeycomb Ice Cream
- 9. Easy Homemade Key Lime Pie Ice Cream
- 10. Easy Homemade Pineapple Ice Cream
- 11. Easy Ninja Creami Cookies And Cream
- 12. Easy No Churn Blueberry Pie Ice Cream
Easy Brown Sugar Cinnamon Ice Cream Recipe
This brown sugar cinnamon ice cream brings a comforting, warm flavor to a cold treat. It’s simple to make and tastes like a cozy hug in a bowl, perfect for any time of year.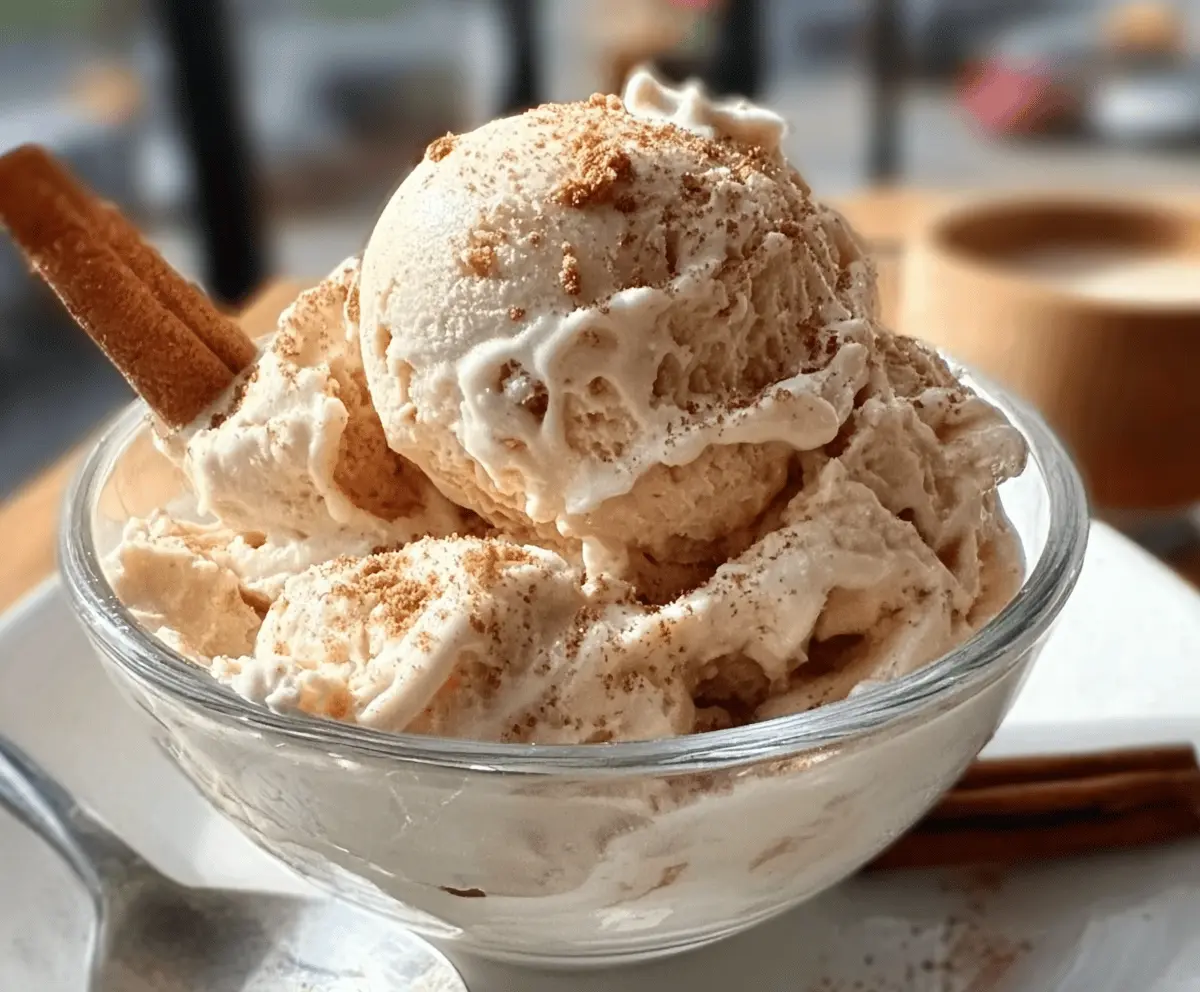
Key Ingredients & Tips
- Brown Sugar: Use packed brown sugar for the best deep, caramel-like sweetness in your ice cream.
- Cinnamon: Fresh ground cinnamon makes a big difference for that warm, inviting flavor.
- No-Churn Method: This recipe is designed to be simple, so you won’t need an ice cream maker for perfect results.
What You Need
- 2 cups heavy cream, cold
- 1 (14 ounce) can sweetened condensed milk
- 1/2 cup packed light brown sugar
- 1 teaspoon ground cinnamon
- 1/2 teaspoon vanilla extract
⏱️ Time: 20 min prep, 6 hr freeze🍽️ Yields: 1 quart
How to Make It
Step 1: Whip the Cream
In a large, cold bowl, beat the heavy cream with an electric mixer until stiff peaks form. Make sure your cream is very cold for the best results when whipping.
Step 2: Combine Flavors
In a separate bowl, mix the sweetened condensed milk, brown sugar, cinnamon, and vanilla extract until well combined. This is your flavorful base for the ice cream.
Step 3: Fold and Freeze
Gently fold the condensed milk mixture into the whipped cream until no streaks remain. Pour the mixture into a freezer-safe container, cover, and freeze for at least 6 hours, or until solid.
📝 Final Note
For the best texture, let your ice cream sit out for 5-10 minutes before scooping.
Easy Cottage Cheese Peanut Butter Ice Cream Recipe
This unique cottage cheese peanut butter ice cream is surprisingly creamy and packed with protein. It’s a simple, healthier way to enjoy a frozen treat without much effort.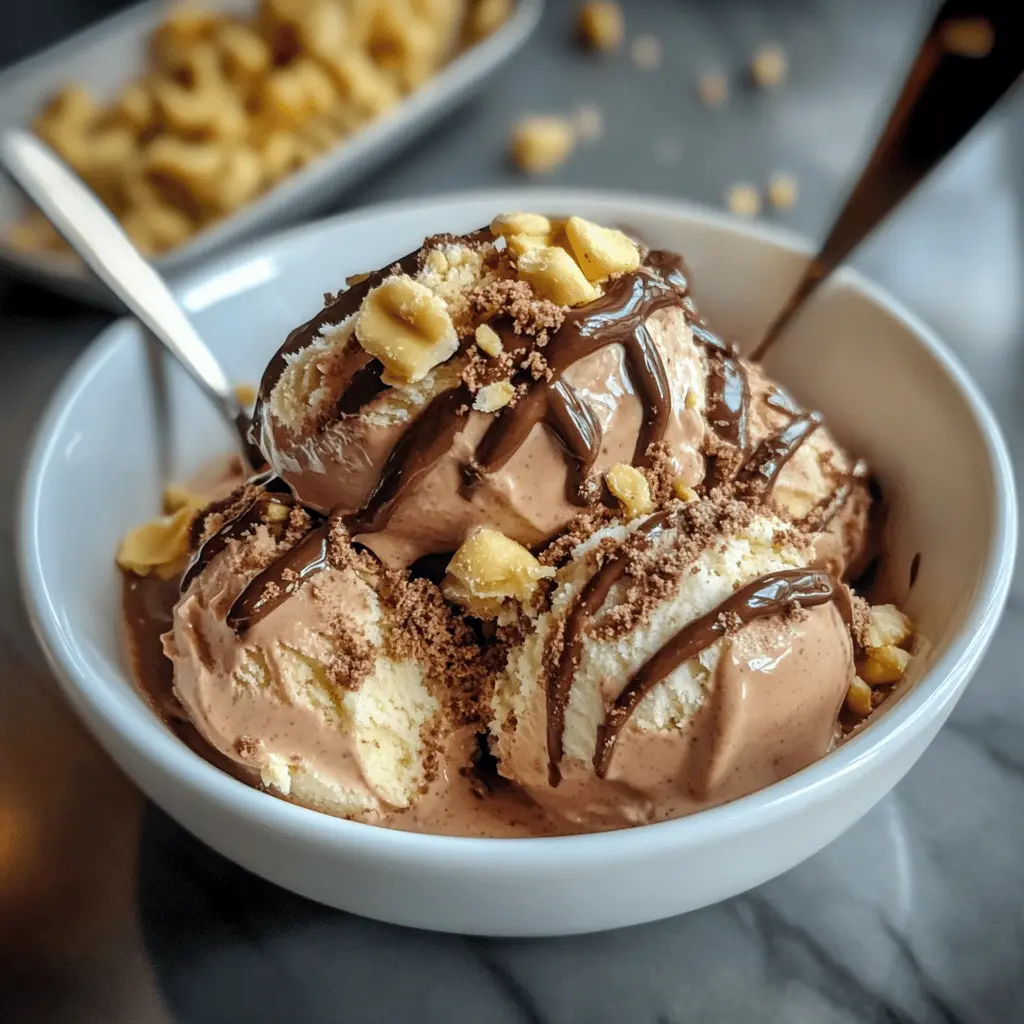
Key Ingredients & Tips
- Cottage Cheese: Use full-fat cottage cheese for the smoothest and richest ice cream texture.
- Peanut Butter: Creamy peanut butter works best for a smooth base, but chunky can add texture if you like.
- Blender Prep: A good blender is key to making sure the cottage cheese breaks down completely for a smooth finish.
What You Need
- 1 cup cottage cheese
- 1/2 cup creamy peanut butter
- 1/4 cup milk (any kind)
- 2-3 tablespoons honey or maple syrup
- 1/2 teaspoon vanilla extract
⏱️ Time: 15 min prep, 5 hr freeze🍽️ Yields: 3 servings
How to Make It
Step 1: Blend Ingredients Smooth
Add the cottage cheese, peanut butter, milk, honey (or maple syrup), and vanilla extract to a blender. Blend on high speed until the mixture is completely smooth and no lumps of cottage cheese remain.
Step 2: Pour and Chill
Pour the blended mixture into a freezer-safe container. Make sure it’s a shallow container for faster freezing.
Step 3: Freeze Until Firm
Cover the container and freeze for at least 5 hours, or until the ice cream is firm enough to scoop. If it gets too hard, let it soften on the counter for a few minutes before serving.
📝 Final Note
You can add a swirl of chocolate fudge or chopped peanuts for extra texture and flavor before freezing.
Easy Creamy Almond Milk Ice Cream Recipe
If you’re looking for a dairy-free dessert, this creamy almond milk ice cream is a fantastic choice. It’s smooth, refreshing, and easy to customize with your favorite flavors.
Key Ingredients & Tips
- Almond Milk: Use unsweetened almond milk to control the sweetness yourself.
- Cornstarch Slurry: A small amount of cornstarch mixed with water helps create a thicker, creamier texture without dairy.
- Coconut Cream: Adding a bit of full-fat canned coconut cream can make this dairy-free ice cream even richer.
What You Need
- 2 cups unsweetened almond milk
- 1/2 cup granulated sugar
- 1 tablespoon cornstarch
- 2 tablespoons water
- 1 teaspoon vanilla extract
- 1/4 cup full-fat coconut cream (optional)
⏱️ Time: 25 min prep, 8 hr freeze🍽️ Yields: 1.5 pints
How to Make It
Step 1: Prepare Almond Milk Base
In a saucepan, heat almond milk and sugar over medium heat, stirring until sugar dissolves. In a small bowl, whisk cornstarch and water to create a slurry.
Step 2: Thicken and Chill
Gradually whisk the cornstarch slurry into the hot almond milk mixture. Bring to a gentle simmer, stirring constantly, until the mixture thickens slightly. Remove from heat, stir in vanilla and coconut cream (if using). Pour into a bowl, cover, and chill completely in the refrigerator for at least 4 hours.
Step 3: Churn and Freeze
Once chilled, pour the mixture into your ice cream maker and churn according to the manufacturer’s instructions. Transfer the soft ice cream to a freezer-safe container and freeze for another 4-6 hours until firm.
📝 Final Note
Make sure your base is very cold before churning; this helps prevent ice crystals from forming.
Easy Creamy Lemon Ice Cream Recipe
Brighten your day with this easy creamy lemon ice cream, bursting with fresh citrus flavor. It’s a refreshing dessert that’s perfect after any meal, offering a light and tangy taste.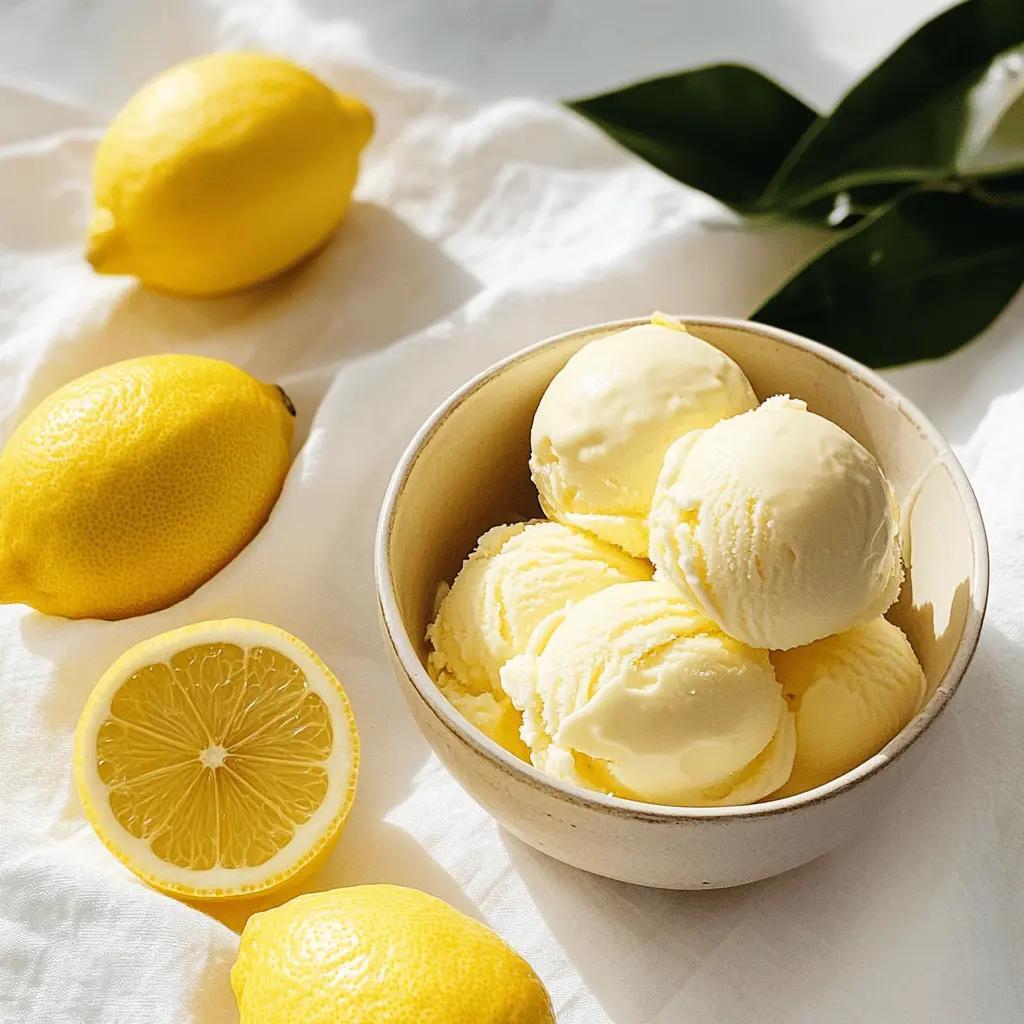
Key Ingredients & Tips
- Fresh Lemon Zest: The zest contains essential oils that give a strong, pure lemon aroma and taste.
- Lemon Juice: Freshly squeezed lemon juice is key for the best tangy flavor in this ice cream.
- No-Churn Method: You can make this wonderfully creamy ice cream without an ice cream maker, making it super accessible.
What You Need
- 2 cups heavy cream, cold
- 1 (14 ounce) can sweetened condensed milk
- 1/2 cup fresh lemon juice
- 2 tablespoons lemon zest
- Pinch of salt
⏱️ Time: 15 min prep, 6 hr freeze🍽️ Yields: 1 quart
How to Make It
Step 1: Whip the Cream
In a large, chilled bowl, whip the cold heavy cream with an electric mixer until it forms firm peaks. This creates the light and airy base for your ice cream.
Step 2: Prepare Lemon Base
In another bowl, whisk together the sweetened condensed milk, fresh lemon juice, lemon zest, and a pinch of salt until everything is well combined and smooth.
Step 3: Combine and Freeze
Gently fold the lemon mixture into the whipped cream until no streaks remain. Pour the combined mixture into a freezer-safe container, cover tightly, and freeze for at least 6 hours, or until solid.
📝 Final Note
For a brighter yellow color, you can add a tiny drop of yellow food coloring if you wish.
Easy Homemade Biscoff Ice Cream Recipe
Treat yourself to this easy homemade Biscoff ice cream, a dreamy dessert with distinct caramel and spice notes. It’s a fantastic way to enjoy the popular cookie flavor in a frozen form.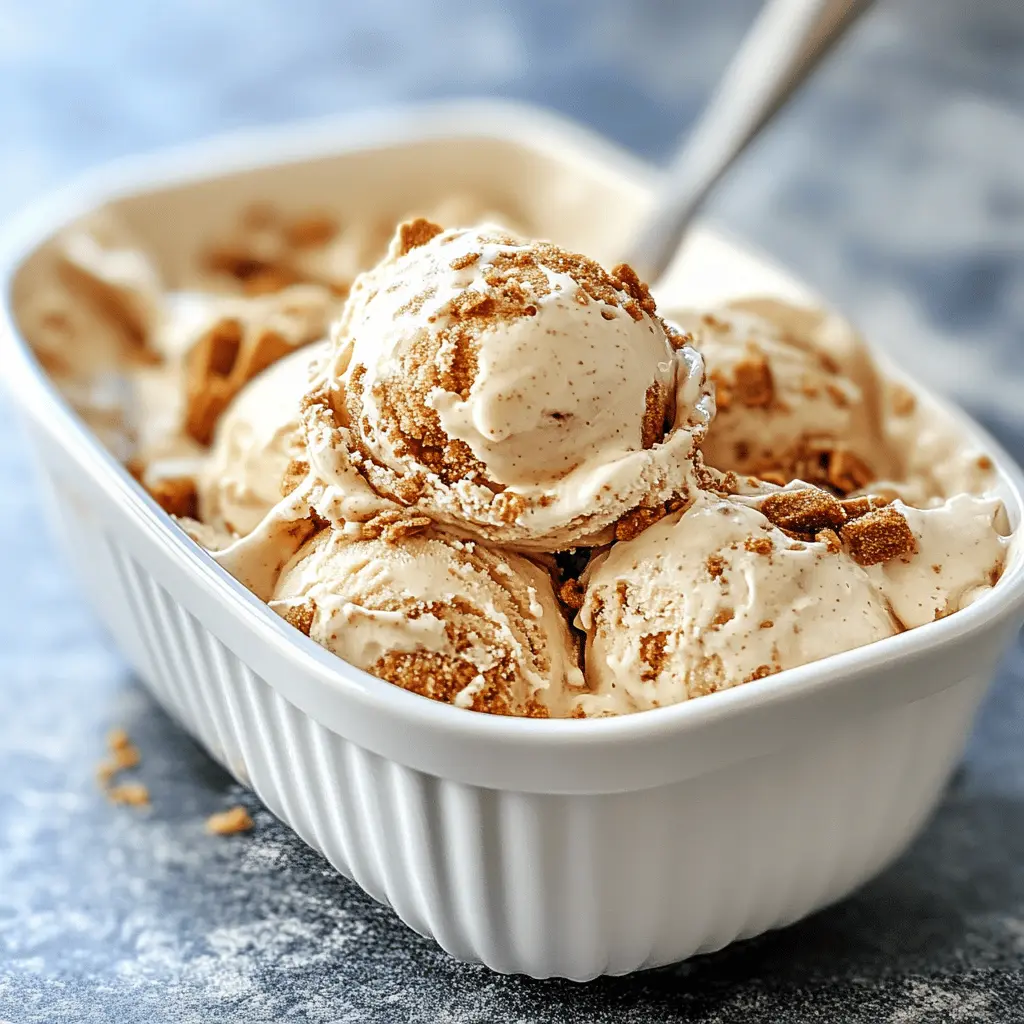
Key Ingredients & Tips
- Biscoff Spread: Use the creamy version of Biscoff spread for smooth integration into the ice cream base.
- Crushed Biscoff Cookies: Add crushed cookies in layers for a lovely textural contrast and extra cookie flavor.
- No-Churn Method: This recipe is a simple no-churn option, so you don’t need an ice cream maker to achieve creamy results.
What You Need
- 2 cups heavy cream, cold
- 1 (14 ounce) can sweetened condensed milk
- 1/2 cup Biscoff spread (creamy)
- 1 teaspoon vanilla extract
- 1 cup crushed Biscoff cookies
⏱️ Time: 20 min prep, 7 hr freeze🍽️ Yields: 1.5 quarts
How to Make It
Step 1: Whip the Cream
In a large, chilled bowl, whip the cold heavy cream until it holds firm peaks. Be careful not to overbeat, or it might become grainy.
Step 2: Fold in Biscoff Base
In a separate bowl, combine the sweetened condensed milk, Biscoff spread, and vanilla extract until smooth. Gently fold this mixture into the whipped cream until just combined.
Step 3: Layer and Freeze
Pour half of the ice cream mixture into a freezer-safe container. Sprinkle half of the crushed Biscoff cookies over it. Add the remaining ice cream mixture and top with the rest of the cookies. Cover and freeze for at least 7 hours, or until completely firm.
📝 Final Note
Warm a knife or scoop under hot water before cutting or scooping for easier serving.
Easy Homemade Blueberry Ice Cream Recipe
Enjoy the sweet and tangy taste of summer with this easy homemade blueberry ice cream. It’s packed with fresh berry flavor and makes a lovely vibrant dessert.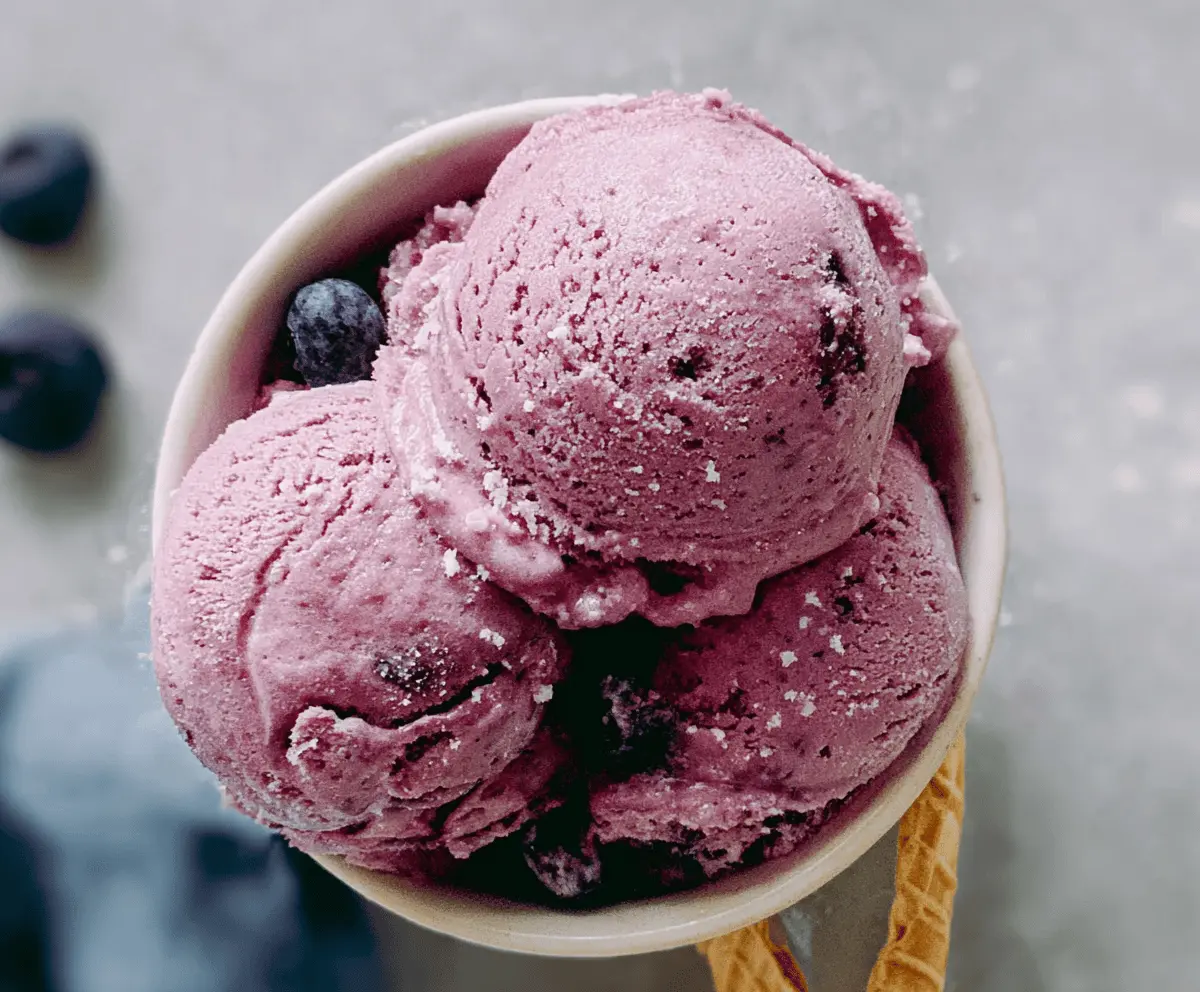
Key Ingredients & Tips
- Fresh Blueberries: Use ripe, sweet blueberries for the best natural flavor and color in your ice cream.
- Lemon Juice: A squeeze of lemon juice helps brighten the blueberry flavor and adds a nice balance to the sweetness.
- Simple Syrup Base: Cooking the blueberries into a simple syrup base before adding to the cream creates a smoother ice cream texture.
What You Need
- 2 cups fresh blueberries
- 1/2 cup granulated sugar (plus more for base)
- 1 tablespoon lemon juice
- 2 cups heavy cream
- 1 cup whole milk
- 1 teaspoon vanilla extract
⏱️ Time: 25 min prep, 8 hr freeze🍽️ Yields: 1 quart
How to Make It
Step 1: Make Blueberry Puree
In a small saucepan, combine blueberries, 1/2 cup sugar, and lemon juice. Cook over medium heat, stirring occasionally, until blueberries burst and the mixture thickens slightly, about 5-7 minutes. Mash some blueberries if you like. Let cool completely, then blend into a smooth puree if desired.
Step 2: Prepare Ice Cream Base
In a large bowl, whisk together heavy cream, whole milk, any remaining sugar, and vanilla extract. Stir in the cooled blueberry puree until well combined.
Step 3: Churn and Freeze
Pour the mixture into your ice cream maker and churn according to the manufacturer’s directions until it reaches a soft-serve consistency. Transfer to a freezer-safe container and freeze for 6-8 hours, or until firm.
📝 Final Note
For an even richer color, consider adding a few drops of natural purple or blue food coloring.
Easy Homemade Custard Ice Cream Recipe
This easy homemade custard ice cream delivers a super rich, smooth, and creamy texture that melts perfectly. It’s a classic choice for ice cream lovers, offering a taste of old-fashioned goodness.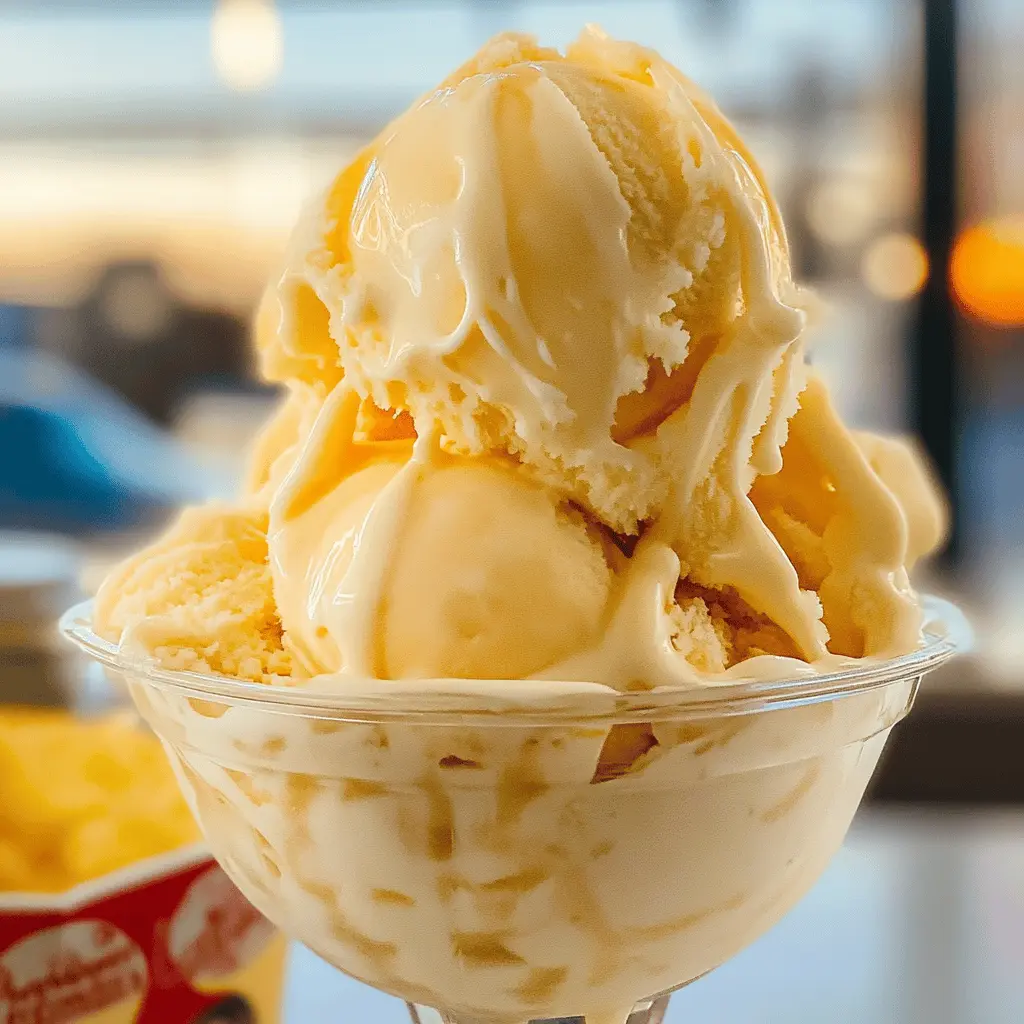
Key Ingredients & Tips
- Egg Yolks: The key to a true custard ice cream, egg yolks provide incredible richness and a smooth consistency.
- Tempering Eggs: Slowly adding hot cream to the egg yolks prevents them from scrambling, creating a perfectly smooth custard.
- Slow Cooking: Cook the custard base slowly over medium-low heat, stirring constantly, until it thickens enough to coat the back of a spoon.
What You Need
- 1 1/2 cups heavy cream
- 1 1/2 cups whole milk
- 3/4 cup granulated sugar
- 6 large egg yolks
- 1 teaspoon vanilla extract or vanilla bean paste
- Pinch of salt
⏱️ Time: 30 min prep, 4 hr chill, 25 min churn🍽️ Yields: 1.25 quarts
How to Make It
Step 1: Prepare the Custard Base
In a medium saucepan, combine heavy cream, milk, half of the sugar, and salt. Heat over medium-low heat until the mixture is simmering gently. In a separate bowl, whisk egg yolks with the remaining sugar until light and creamy.
Step 2: Temper and Thicken
Slowly pour about half of the hot cream mixture into the egg yolks, whisking constantly to temper them. Pour the tempered egg mixture back into the saucepan with the remaining cream. Cook over low heat, stirring constantly with a spatula, until the custard thickens enough to coat the back of a spoon (about 175°F / 80°C). Do not boil.
Step 3: Chill and Churn
Remove from heat, stir in vanilla extract. Pour the custard through a fine-mesh sieve into a clean bowl. Cover the surface with plastic wrap to prevent a skin from forming and chill completely in the refrigerator for at least 4 hours, or overnight. Once chilled, churn in your ice cream maker according to the manufacturer’s directions, then transfer to a freezer-safe container and freeze until firm.
📝 Final Note
For an even smoother custard, strain the mixture through a fine-mesh sieve after cooking to catch any small egg bits.
Easy Homemade Honeycomb Ice Cream Recipe
Create a delightful crunch with this easy homemade honeycomb ice cream. It features sweet, crispy pieces of honeycomb candy swirled into a smooth, creamy base, offering a lovely contrast in every bite.
Key Ingredients & Tips
- Honeycomb Candy: You can use store-bought honeycomb or make your own for a truly special treat.
- No-Churn Method: This recipe uses a no-churn method, making it easy to create this delicious ice cream without special equipment.
- Adding Crunch: Mix in the crushed honeycomb just before the final freeze to keep it crunchy.
What You Need
- 2 cups heavy cream, cold
- 1 (14 ounce) can sweetened condensed milk
- 1 teaspoon vanilla extract
- 1 cup crushed honeycomb candy
⏱️ Time: 20 min prep, 6 hr freeze🍽️ Yields: 1 quart
How to Make It
Step 1: Whip the Cream
In a large, chilled bowl, whip the cold heavy cream with an electric mixer until it forms stiff peaks. This will give your ice cream its airy texture.
Step 2: Combine Base Ingredients
In another bowl, stir together the sweetened condensed milk and vanilla extract until smooth. This forms the sweet base for your ice cream.
Step 3: Fold and Freeze with Honeycomb
Gently fold the condensed milk mixture into the whipped cream until just combined. Stir in the crushed honeycomb candy. Pour the mixture into a freezer-safe container, cover, and freeze for at least 6 hours, or until solid.
📝 Final Note
If your honeycomb softens, you can freeze it separately and add it as a topping right before serving.
Easy Homemade Key Lime Pie Ice Cream Recipe
Capture the vibrant taste of a classic dessert with this easy homemade key lime pie ice cream. It’s zesty, creamy, and features crunchy graham cracker pieces, just like the pie.
Key Ingredients & Tips
- Key Lime Juice & Zest: Fresh key lime juice and zest are essential for that distinct tart and fragrant flavor.
- Graham Cracker Crumbs: These add the delightful “pie crust” texture and flavor to the ice cream.
- Sweetened Condensed Milk: This forms the rich, creamy base without needing an ice cream maker.
What You Need
- 2 cups heavy cream, cold
- 1 (14 ounce) can sweetened condensed milk
- 1/2 cup fresh key lime juice
- 1 tablespoon key lime zest
- 1 cup graham cracker crumbs
⏱️ Time: 20 min prep, 7 hr freeze🍽️ Yields: 1.25 quarts
How to Make It
Step 1: Whip Cream
In a large, chilled bowl, whip the cold heavy cream with an electric mixer until firm peaks form. Make sure your cream is very cold for proper whipping.
Step 2: Create Key Lime Base
In a separate bowl, combine the sweetened condensed milk, key lime juice, and key lime zest. Stir until the mixture is smooth and evenly colored.
Step 3: Fold, Layer, and Freeze
Gently fold the key lime mixture into the whipped cream until just combined. Pour half of the ice cream mixture into a freezer-safe container. Sprinkle half of the graham cracker crumbs over it. Add the remaining ice cream mixture and top with the rest of the crumbs. Cover and freeze for at least 7 hours, or until firm.
📝 Final Note
You can lightly toast the graham cracker crumbs for extra flavor before adding them to the ice cream.
Easy Homemade Pineapple Ice Cream Recipe
Bring a taste of the tropics home with this easy homemade pineapple ice cream. It’s wonderfully refreshing, sweet, and simple to prepare, making it a perfect summer treat.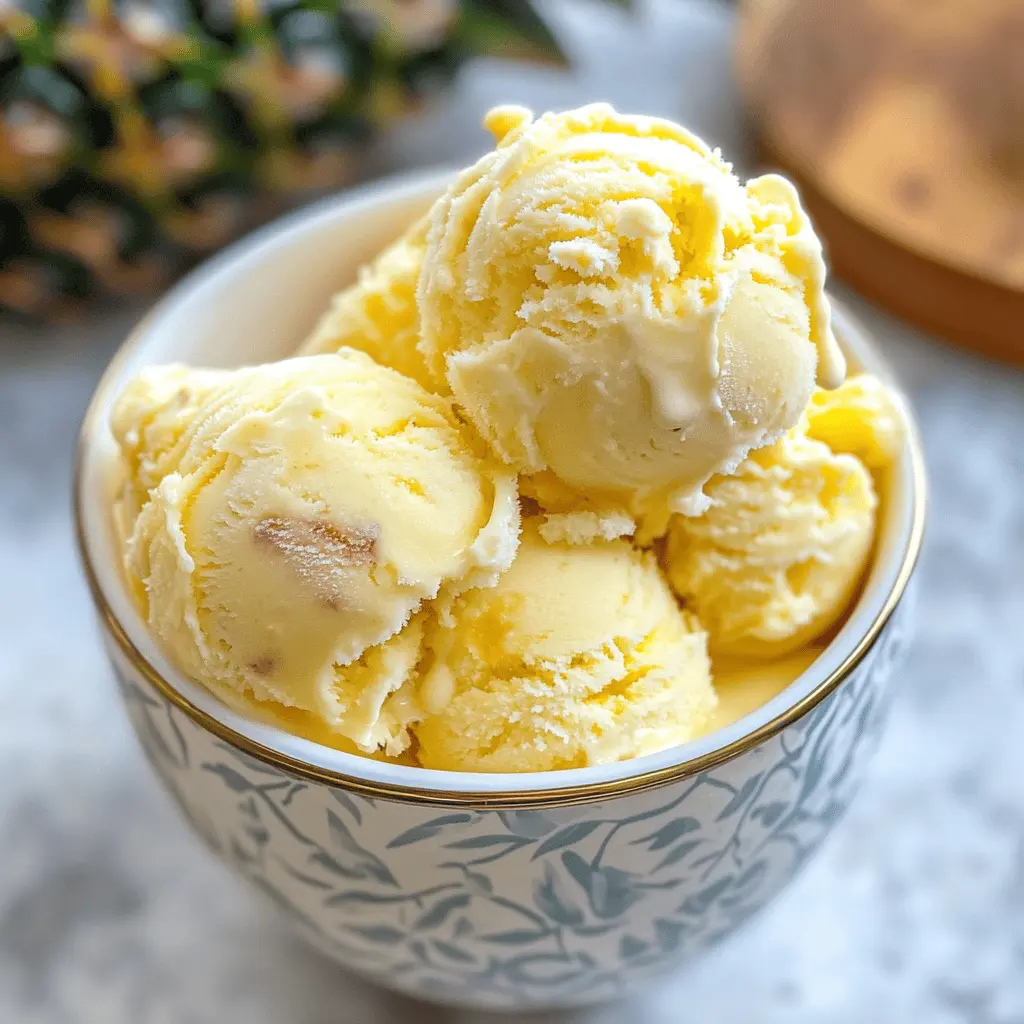
Key Ingredients & Tips
- Fresh Pineapple: Using fresh, ripe pineapple will give you the best natural sweetness and tang.
- Coconut Milk: Full-fat coconut milk provides a creamy, dairy-free base and complements the pineapple flavor.
- Blender Method: A blender makes quick work of creating a smooth pineapple puree for this ice cream.
What You Need
- 2 cups fresh pineapple chunks
- 1 (13.5 ounce) can full-fat coconut milk, chilled
- 1/4 cup granulated sugar or honey (adjust to taste)
- 1 tablespoon lime juice
⏱️ Time: 15 min prep, 5 hr freeze🍽️ Yields: 3 servings
How to Make It
Step 1: Blend Pineapple Puree
In a blender, combine the fresh pineapple chunks, chilled coconut milk, sugar (or honey), and lime juice. Blend until completely smooth and creamy.
Step 2: Taste and Adjust Sweetness
Taste the mixture and add more sugar or honey if you prefer a sweeter ice cream. The sweetness of your pineapple can vary, so adjust as needed.
Step 3: Freeze Until Firm
Pour the pineapple mixture into a freezer-safe container. Cover tightly and freeze for at least 5 hours, or until it reaches your desired firm consistency.
📝 Final Note
For a firmer scoop, let it freeze longer. If it’s too hard, let it soften for a few minutes before serving.
Easy Ninja Creami Cookies And Cream Recipe
Make perfect cookies and cream ice cream with ease using your Ninja Creami machine. This recipe delivers a wonderfully creamy texture and plenty of cookie bits for a classic favorite.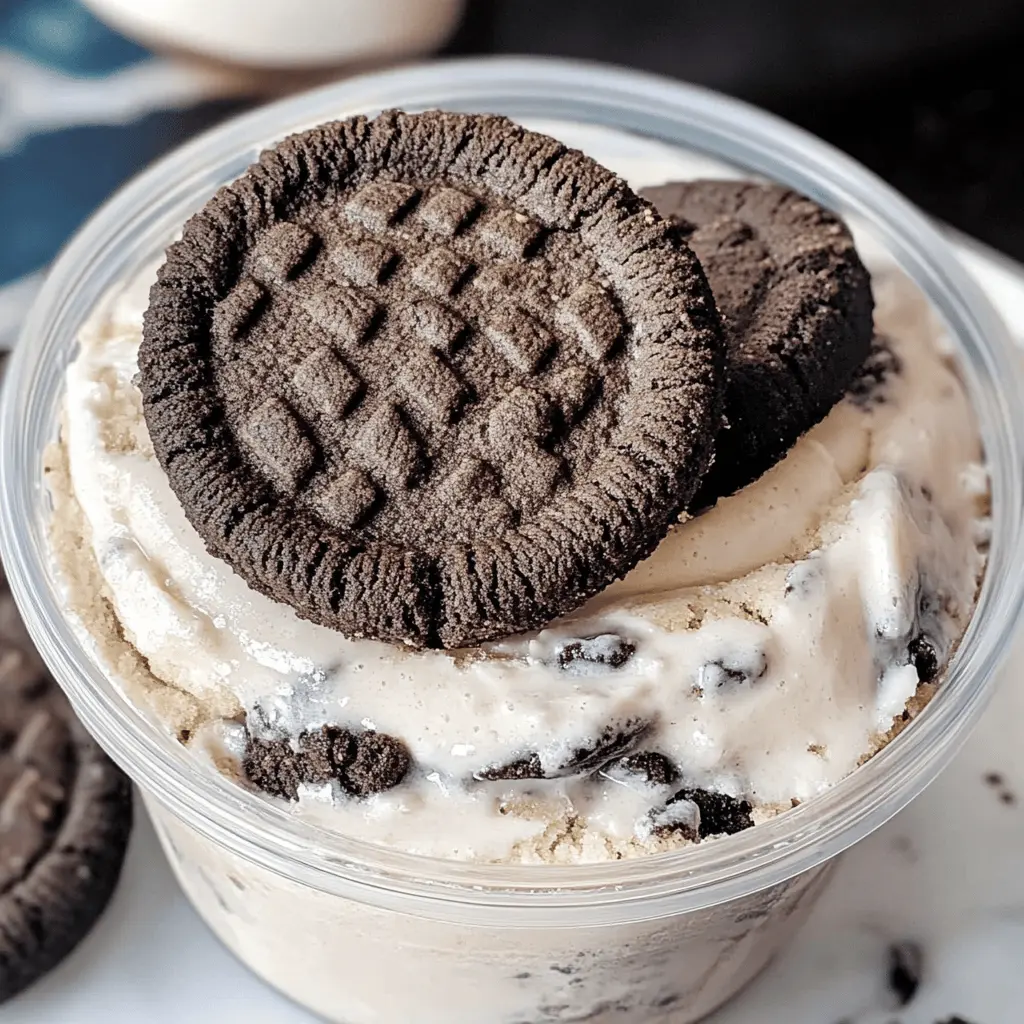
Key Ingredients & Tips
- Ninja Creami: This appliance is key for achieving the unique, soft texture of this ice cream.
- Oreo Cookies: Use regular Oreos, crushed into varying sizes for both flavor and texture contrast.
- Milk Base: A simple milk and cream base ensures the perfect consistency for the Ninja Creami process.
What You Need
- 1 1/2 cups whole milk
- 1/2 cup heavy cream
- 1/4 cup granulated sugar (adjust to taste)
- 1/2 teaspoon vanilla extract
- 8-10 Oreo cookies, crushed
⏱️ Time: 5 min prep, 24 hr freeze, 2 min process🍽️ Yields: 1 pint
How to Make It
Step 1: Prepare the Base
In a Ninja Creami pint container, whisk together the whole milk, heavy cream, sugar, and vanilla extract until the sugar is fully dissolved.
Step 2: Freeze Solid
Place a lid on the pint container and freeze it flat for at least 24 hours, or until the base is completely solid and frozen through. This is crucial for the Ninja Creami.
Step 3: Process and Add Mix-ins
Remove the pint from the freezer and place it into your Ninja Creami machine. Select the “Light Ice Cream” or “Ice Cream” function. Once processed, create a hole in the center of the ice cream and add the crushed Oreo cookies. Place the pint back in the machine and select the “Mix-in” function to evenly distribute the cookies.
📝 Final Note
If your ice cream is crumbly after the first process, add 1-2 tablespoons of milk and re-spin for a creamier texture before adding mix-ins.
Easy No Churn Blueberry Pie Ice Cream Recipe
Enjoy all the flavors of a blueberry pie in a cool, creamy ice cream with this easy no-churn recipe. It’s perfect for summer gatherings or a sweet treat any night of the week.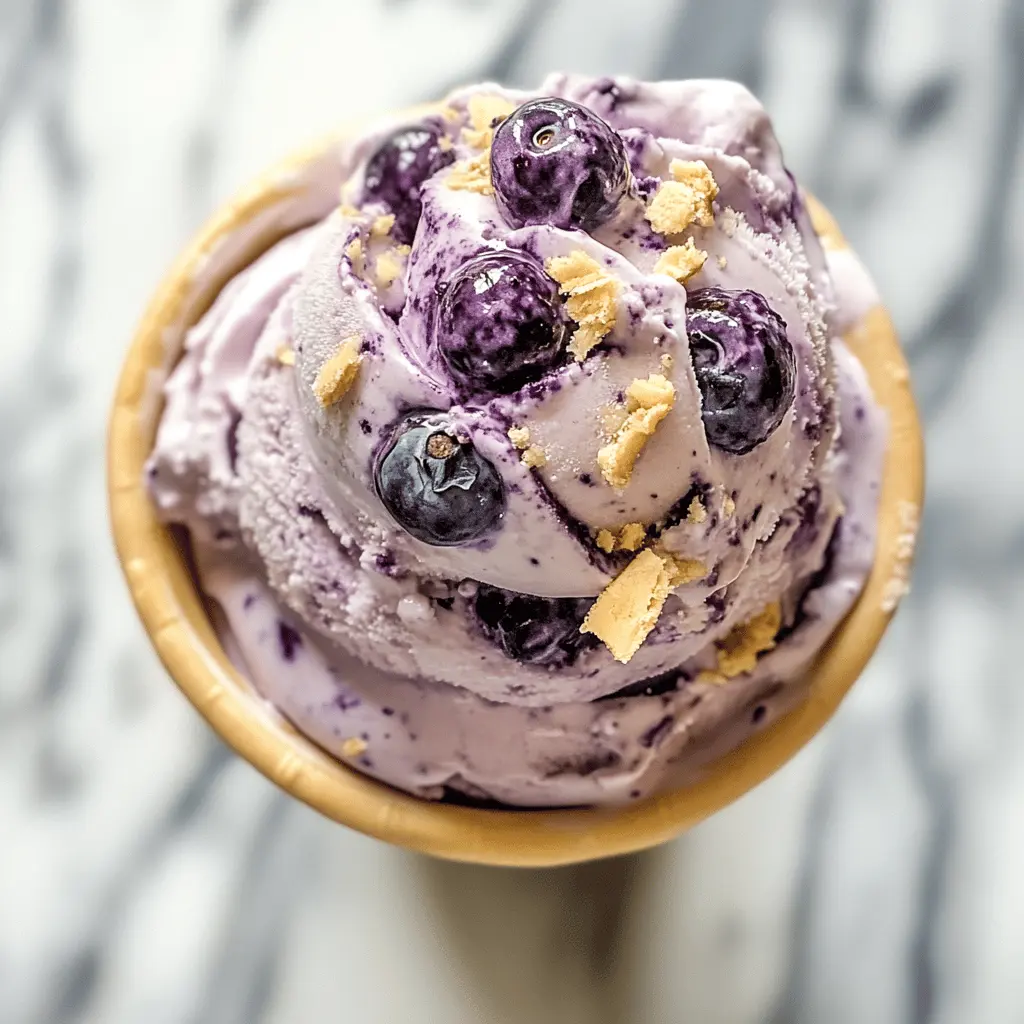
Key Ingredients & Tips
- No-Churn Method: This recipe uses a simple combination of whipped cream and condensed milk for an easy freeze.
- Blueberry Pie Filling: Store-bought or homemade blueberry pie filling provides a delicious fruit swirl and pie-like sweetness.
- Graham Crackers: Crushed graham crackers add the essential “pie crust” texture and flavor to the ice cream.
What You Need
- 2 cups heavy cream, cold
- 1 (14 ounce) can sweetened condensed milk
- 1 teaspoon vanilla extract
- 1 cup blueberry pie filling
- 1/2 cup graham cracker crumbs
⏱️ Time: 20 min prep, 8 hr freeze🍽️ Yields: 1.5 quarts
How to Make It
Step 1: Whip the Cream
In a large, chilled bowl, whip the cold heavy cream with an electric mixer until stiff peaks form. The colder your cream, the better it will whip.
Step 2: Combine Base Flavors
In a separate bowl, stir together the sweetened condensed milk and vanilla extract until smooth. Gently fold this mixture into the whipped cream until just combined, being careful not to deflate the cream.
Step 3: Layer and Freeze
Pour half of the ice cream mixture into a freezer-safe container. Dollop half of the blueberry pie filling over it and sprinkle with half of the graham cracker crumbs. Gently swirl with a knife. Repeat with the remaining ice cream mixture, pie filling, and crumbs. Cover and freeze for at least 8 hours, or until firm.
📝 Final Note
For a nice presentation, save a few spoonfuls of pie filling and a pinch of crumbs to swirl on top right before serving.