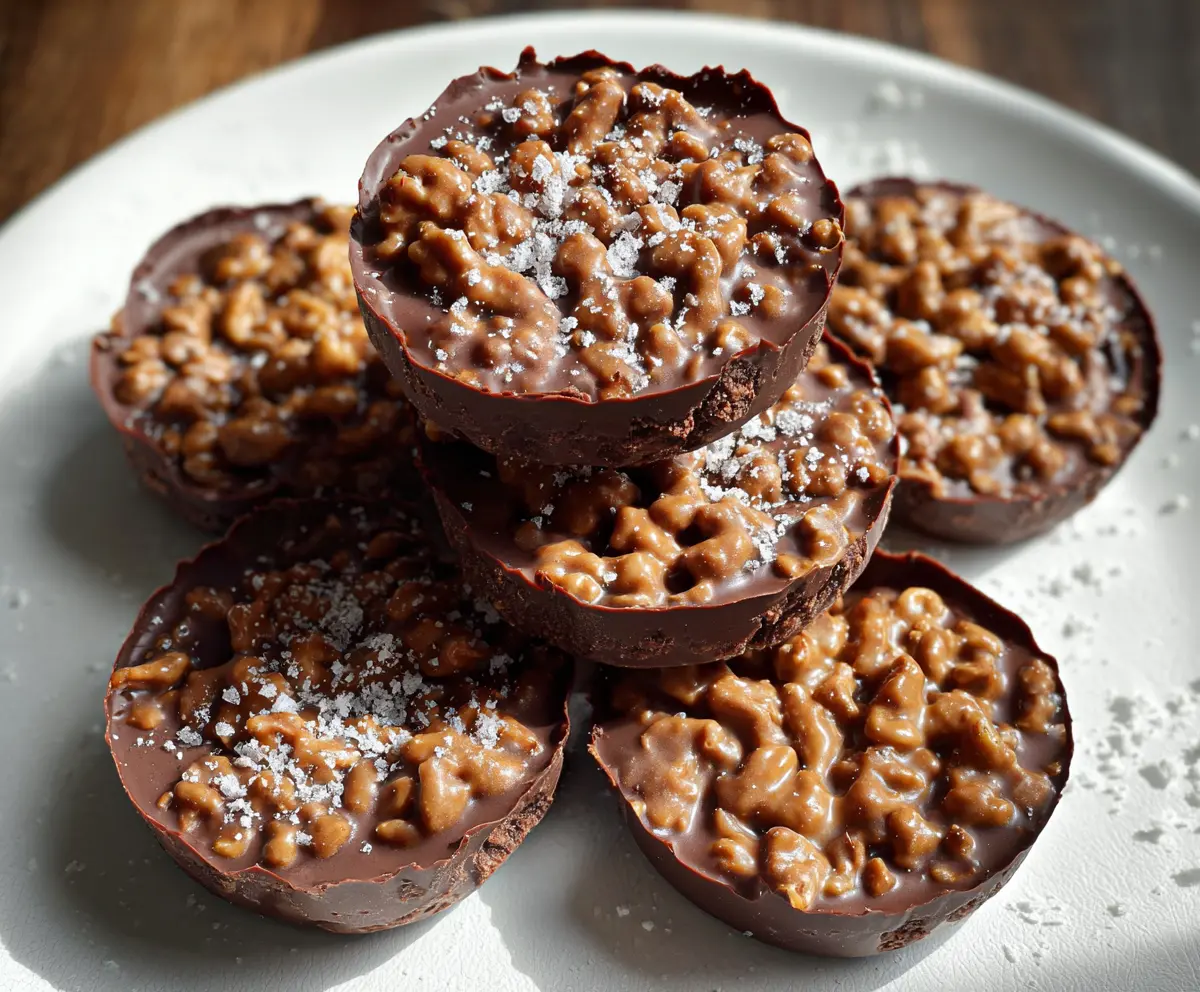
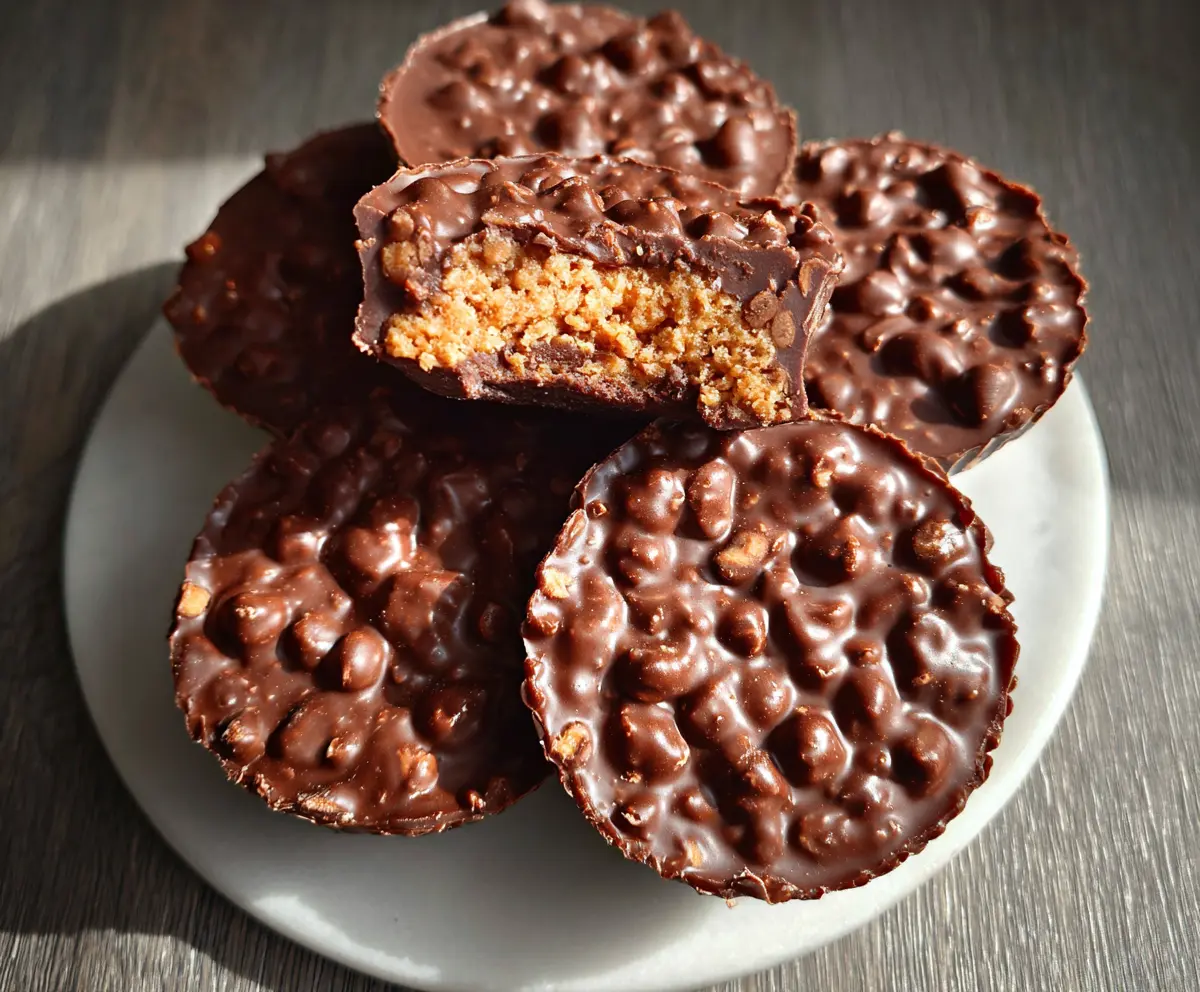
These Chocolate Peanut Butter Crunch Cups are the perfect treat! With creamy peanut butter and crunchy bits wrapped in rich chocolate, they’re just the right mix of sweet and salty.
Everyone loves a bite-sized sweet, and these cups are so easy to make! Whether for a snack or dessert, I find they always disappear quickly—better make a double batch! 😄
Key Ingredients & Substitutions
Smooth Peanut Butter: This is the star ingredient! You can use natural peanut butter for a healthier twist, but be aware that it may separate more easily. I often use creamy peanut butter, as it mixes perfectly with the sugary filling.
Unsalted Butter: The unsalted butter helps control the saltiness of the cups. If you prefer dairy-free, coconut oil or vegan butter works well as a substitute, giving a slightly different flavor.
Powdered Sugar: This sugar blends smoothly with the peanut butter mixture. If you’re looking for a healthier option, try using coconut sugar blended into a powder, but note this will change the sweetness level slightly.
Semi-sweet Chocolate Chips: These provide the rich chocolate flavor. Dark chocolate or milk chocolate can be used based on taste preference. For a dairy-free option, look for dairy-free chocolate chips.
Rice Cereal: Rice Krispies bring that crunch factor. If you can’t find them, substitutions like cornflakes or other crispy cereals will work. For a gluten-free version, use gluten-free rice cereal.
How Do I Melt Chocolate Perfectly?
Melted chocolate is crucial for this recipe, and you want it smooth and velvety. Using a microwave method is quick, but be careful not to burn it:
- Place your chocolate chips in a microwave-safe bowl.
- Heat in 30-second intervals, stirring well after each. This helps prevent hot spots.
- Once mostly melted, stir continuously until completely smooth. This will give you that perfect texture!
Always remember, if chocolate burns, it won’t be usable. So keep an eye on it! I usually prefer this method over stovetop to keep things simple and quick.
How to Make Chocolate Peanut Butter Crunch Cups
Ingredients You’ll Need:
- 1 cup smooth peanut butter
- 1/4 cup unsalted butter, softened
- 1 cup powdered sugar
- 1 1/2 cups semi-sweet chocolate chips
- 1 1/2 cups rice cereal (such as Rice Krispies)
- Flaky sea salt, for sprinkling
How Much Time Will You Need?
This recipe takes about 15 minutes to prepare and then requires at least 1 hour to chill in the refrigerator for the chocolate to set. You’ll spend a few minutes mixing and melting, so grab your favorite tunes to keep things fun while you work!
Step-by-Step Instructions:
1. Mixing the Peanut Butter Mixture:
Start by grabbing a medium bowl. In it, combine the smooth peanut butter and softened butter. Mix them together well until the mixture is smooth and creamy. You want to ensure that the butter is fully incorporated so the mixture blends nicely.
2. Adding the Sweetness:
Next, it’s time to add the powdered sugar into the peanut butter mixture. Gradually sprinkle it in while stirring. Keep mixing until everything is smooth and there are no lumps. This is where the magic happens, turning your mixture into a sweet, creamy delight!
3. Mix in the Crunch:
Now, gently fold in the rice cereal. Be careful not to crush them—just stir until all pieces are well coated in the peanut butter mixture. This will give your cups that wonderful crunch we all love!
4. Melting the Chocolate:
In a microwave-safe bowl, place the semi-sweet chocolate chips. Microwave them in 30-second intervals. After each interval, stir well until the chocolate is completely smooth. Be cautious to not overheat, as burnt chocolate can’t be salvaged.
5. Assembling the Cups:
Grab a muffin tin or a silicone mold. Spoon about 1 tablespoon of the melted chocolate into the bottom of each cup. Use the back of the spoon to spread the chocolate evenly. This forms your first layer, so make sure it’s nice and even!
6. Adding the Peanut Butter Crunch Layer:
Now it’s time for the peanut butter crunch mixture! Take a generous spoonful and place it on top of the chocolate layer in each cup. Press down gently to flatten it out evenly. This ensures you get that perfect bite!
7. Sealing with Chocolate:
Using the remaining melted chocolate, cover the peanut butter layer with another tablespoon of chocolate. Spread it carefully to seal everything in, ensuring the top is smooth and covered.
8. Final Touches and Chilling:
Sprinkle a little flaky sea salt on top of each cup for an extra flavor boost. Then, pop the whole tray into the refrigerator for at least 1 hour, or until the chocolate is completely set and firm.
9. Enjoy Your Treats!
Once firm, carefully remove the cups from the mold. You can use a butter knife to help pop them out if they’re sticking. Serve these delicious cups straight away, or store any leftovers in an airtight container in the fridge (if they last that long!).
Enjoy your crunchy, creamy homemade Chocolate Peanut Butter Crunch Cups! They’ll be a hit with everyone!
Can I Use Natural Peanut Butter Instead of Regular Peanut Butter?
Yes, you can use natural peanut butter! Just be aware that it may separate more than regular peanut butter, so you might need to stir it well before use for a smooth consistency.
Can I Make These Cups Dairy-Free?
Absolutely! You can use dairy-free chocolate chips and substitute the unsalted butter with coconut oil or a dairy-free butter alternative. This way, you can enjoy the treat without dairy!
What Do I Do If My Chocolate Is Too Thick?
If your melted chocolate is too thick, you can add a little bit of coconut oil or vegetable oil to loosen it up. Stir in small amounts until you reach your desired consistency—this will help it spread more easily over the layers!
How Should I Store Leftovers?
Store any leftovers in an airtight container in the refrigerator for up to a week. If you want to keep them longer, you can freeze them for up to three months. To thaw, just place them in the fridge overnight!